


 Filters


Within Compressors, Belt Drive Compressor covers the compressors that couple the electric motor to the air pump via a belt-and-pulley drive — the workhorse design for sustained, continuous-duty workshop air supply. Belt-drive compressors run at lower pump RPM than direct-drive equivalents, deliver higher CFM at lower noise levels, and are designed for high-cycle workshop and fleet-bay use. Parts For Machines supplies belt-drive compressors for trade and professional applications.
Belt-drive compressors are sized by motor power, tank capacity, and CFM output. Typical trade-grade configurations: 3-4 hp single-phase motors driving 100-150 litre vertical tanks delivering 12-18 CFM at 8 bar — suitable for single-bay workshop and fleet applications; 5-7.5 hp single- or three-phase motors driving 200-270 litre tanks delivering 20-30 CFM — suitable for multi-bay workshops and continuous-duty applications; 10+ hp three-phase compressors driving 270-500 litre tanks delivering 35+ CFM — industrial and high-throughput applications. Parts For Machines is an Authorised Distributor and Seller of SIP across belt-drive compressors.
SIP is the dominant brand at Parts For Machines, with the deepest range across single-phase and three-phase configurations and the workshop standards in the trade-grade segment. Nuair extends the range with compressor-pump options and complete machines used in industrial applications. Sealey, Draper, and Clarke provide additional choice across the smaller tank-and-output configurations. Product pages list motor power (in hp or kW), input voltage and phase (single-phase 230V or three-phase 400V), tank capacity (in litres), CFM output (at the rated working pressure — typically 8 bar / 116 PSI), maximum pressure rating, and pump duty cycle (continuous-duty or 50%-duty intermittent).
The pump and motor sizes determine the cooling and longevity at sustained use. Trade pricing on multi-unit and workshop fit-out orders is available; contact the team via WhatsApp 07754288583 for a quote on full-bay specifications. For pneumatic-tool operation guidance, see the Air Tools sub-section.

| Power (kW) | 1.5 |
|---|---|
| Power (Hp) | 2 |
| Air Displacement (L/min) | 255 |
| Air Displacement (c.f.m) | 9 |
| Maximum Pressure (Bar) | 10 |

| Power (kW) | 1.5 |
|---|---|
| Power (Hp) | 2 |
| Air Displacement (L/min) | 255 |
| Air Displacement (c.f.m) | 9 |
| Maximum Pressure (Bar) | 10 |

| Power (kW) | 2.2 |
|---|---|
| Power (Hp) | 3 |
| Air Displacement (L/min) | 355 |
| Air Displacement (c.f.m) | 12.5 |
| Maximum Pressure (Bar) | 10 |
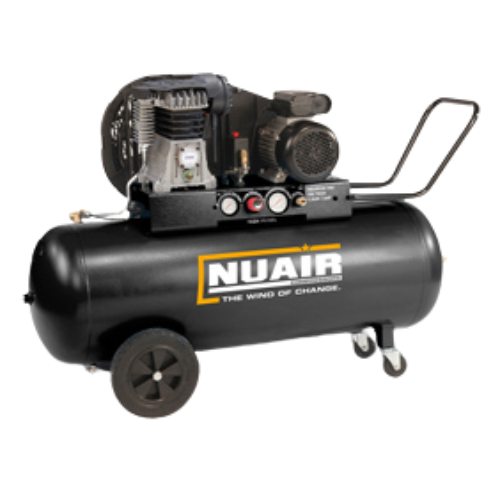
| Power (kW) | 2.2 |
|---|---|
| Power (Hp) | 3 |
| Air Displacement (L/min) | 370 |
| Air Displacement (c.f.m) | 13.06 |
| Maximum Pressure (Bar) | 10 |
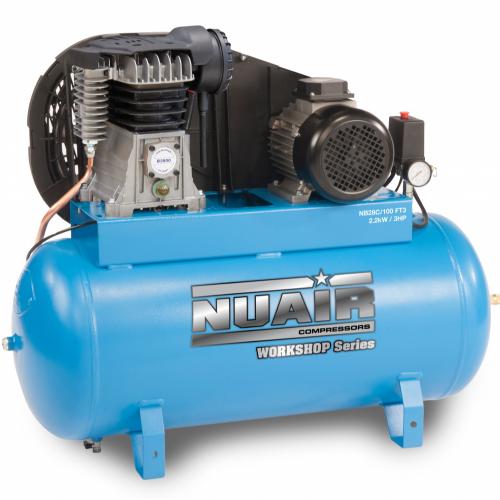
| Power (kW) | 2.2 |
|---|---|
| Power (Hp) | 3 |
| Air Displacement (L/min) | 355 |
| Air Displacement (c.f.m) | 12.5 |
| Maximum Pressure (Bar) | 10 |

| Power (kW) | 2.2 |
|---|---|
| Power (Hp) | 3 |
| Capacity (Dispalcement)(L/min) | 355 |
| Capacity (Dispalcement)(c.f.m) | 12.5 |
| Maximum Pressure (Bar) | 10 |

| Power (kW) | 2.2 |
|---|---|
| Power (Hp) | 3 |
| Capacity (Dispalcement)(L/min) | 355 |
| Capacity (Dispalcement)(c.f.m) | 12.5 |
| Maximum Pressure (Bar) | 10 |

| Power (kW) | 2.2 |
|---|---|
| Power (Hp) | 3 |
| Air Displacement (L/min) | 370 |
| Air Displacement (c.f.m) | 13.06 |
| Maximum Pressure (Bar) | 10 |

| Power (kW) | 2.2 |
|---|---|
| Power (Hp) | 3 |
| Air Displacement (L/min) | 395 |
| Air Displacement (c.f.m) | 13.95 |
| Maximum Pressure (Bar) | 10 |

| Power (kW) | 2.2 |
|---|---|
| Power (Hp) | 3 |
| Air Displacement (L/min) | 395 |
| Air Displacement (c.f.m) | 13.95 |
| Maximum Pressure (Bar) | 10 |

| Power (kW) | 2.2 |
|---|---|
| Power (Hp) | 3 |
| Capacity (Dispalcement)(L/min) | 355 |
| Capacity (Dispalcement)(c.f.m) | 12.5 |
| Maximum Pressure (Bar) | 10 |

| Power (kW) | 2.2 |
|---|---|
| Power (Hp) | 3 |
| Capacity (Dispalcement)(L/min) | 355 |
| Capacity (Dispalcement)(c.f.m) | 13.95 |
| Maximum Pressure (Bar) | 10 |

| Power (kW) | 2.2 |
|---|---|
| Power (Hp) | 3 |
| Capacity (Dispalcement)(L/min) | 355 |
| Capacity (Dispalcement)(c.f.m) | 12.5 |
| Maximum Pressure (Bar) | 10 |

| Power (kW) | 2.2 |
|---|---|
| Power (Hp) | 3 |
| Air Displacement (L/min) | 395 |
| Air Displacement (c.f.m) | 13.95 |
| Maximum Pressure (Bar) | 10 |

| Power (kW) | 2.2 |
|---|---|
| Power (Hp) | 3 |
| Capacity (Dispalcement)(L/min) | 395 |
| Capacity (Dispalcement)(c.f.m) | 13.9 |
| Maximum Pressure (Bar) | 10 |

| Power (kW) | 2.2 |
|---|---|
| Power (Hp) | 3 |
| Capacity (Dispalcement)(L/min) | 355 |
| Capacity (Dispalcement)(c.f.m) | 13.95 |
| Maximum Pressure (Bar) | 10 |

| Power (kW) | 3 |
|---|---|
| Power (Hp) | 4 |
| Capacity (Dispalcement)(L/min) | 495 |
| Capacity (Dispalcement)(c.f.m) | 18 |
| Maximum Pressure (Bar) | 10 |

| Power (kW) | 3 |
|---|---|
| Power (Hp) | 4 |
| Air Displacement (L/min) | 495 |
| Air Displacement (c.f.m) | 18 |
| Maximum Pressure (Bar) | 10 |

| Power (kW) | 4 |
|---|---|
| Power (Hp) | 5.5 |
| Capacity (Dispalcement)(L/min) | 670 |
| Capacity (Dispalcement)(c.f.m) | 23.7 |
| Maximum Pressure (Bar) | 10 |

| Power (kW) | 4 |
|---|---|
| Power (Hp) | 5.5 |
| Air Displacement (L/min) | 680 |
| Air Displacement (c.f.m) | 24 |
| Maximum Pressure (Bar) | 10 |

| Power (kW) | 2.2 |
|---|---|
| Power (Hp) | 3 |
| Capacity (Dispalcement)(L/min) | 390 |
| Capacity (Dispalcement)(c.f.m) | 13.8 |
| Maximum Pressure (Bar) | 10 |

| Power (kW) | 1.5 |
|---|---|
| Power (Hp) | 2 |
| Capacity (Dispalcement)(L/min) | 283 |
| Capacity (Dispalcement)(c.f.m) | 10 |
| Maximum Pressure (Bar) | 10 |

| Power (kW) | 2.2 |
|---|---|
| Power (Hp) | 3 |
| Maximum Pressure (Bar) | 10 |
| Maximum Pressure (Psi) | 145 |
| Air Displacement (L/min) | 390 |

| Power (kW) | 2.2+2.2 |
|---|---|
| Power (Hp) | 3+3 |
| Capacity (Dispalcement)(L/min) | 710 |
| Capacity (Dispalcement)(c.f.m) | 27.9 |
| Maximum Pressure (Bar) | 10 |

| Power (Hp) | 5.5 |
|---|---|
| rpm | 1100 |
| Capacity (Dispalcement)(L/min) | 390 |
| Capacity (Dispalcement)(c.f.m) | 13.8 |
| Maximum Pressure (Bar) | 10 |

| Power (Hp) | 5.5 |
|---|---|
| rpm | 1100 |
| Air Displacement (L/min) | 390 |
| Air Displacement (c.f.m) | 13.8 |
| Maximum Pressure (Bar) | 10 |

| Power (kW) | 5.5 |
|---|---|
| Power (Hp) | 7.5 |
| Capacity (Dispalcement)(L/min) | 840 |
| Capacity (Dispalcement)(c.f.m) | 29.7 |
| Maximum Pressure (Bar) | 10 |

| Power (kW) | 4 |
|---|---|
| Power (Hp) | 5.5 |
| Air Displacement (L/min) | 640 |
| Air Displacement (c.f.m) | 22.9 |
| Maximum Pressure (Bar) | 11 |

| Power (kW) | 2.2 |
|---|---|
| Power (Hp) | 3 |
| Maximum Pressure (Bar) | 10 |
| Maximum Pressure (Psi) | 145 |
| Air Displacement (L/min) | 330 |

| Power (Hp) | 9 |
|---|---|
| rpm | 1400 |
| Air Displacement (L/min) | 460 |
| Air Displacement (c.f.m) | 16.2 |
| Maximum Pressure (Bar) | 10 |
By sharing your email, you agree to our privacy policy & terms of service





 Cart
Cart


 POPULAR CATEGORY


